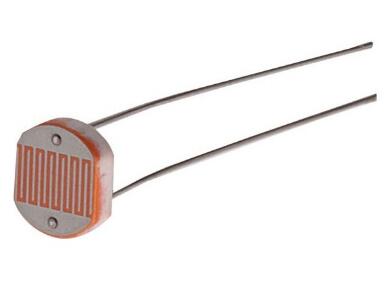
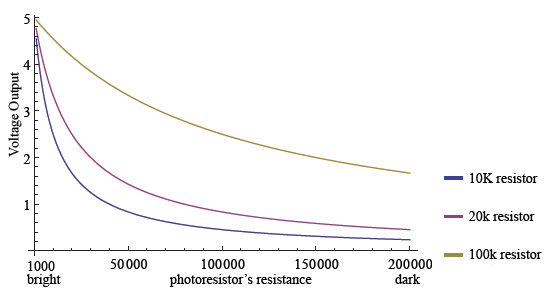
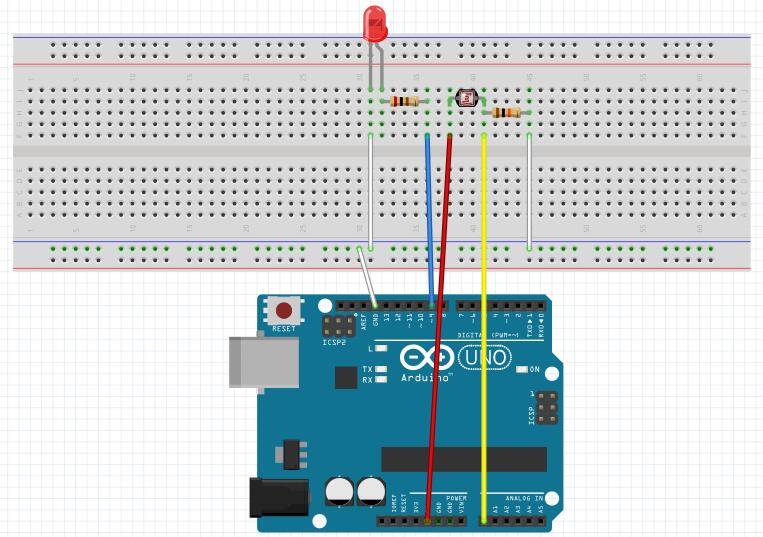
Projet : faire varier l’intensité d’une LED en fonction de la lumière ambiante. Moins il y a de lumière, plus la LED brille. Ou inversement (cf. Sketch). La valeur de la résistance de la LED est de 330 Ohms celle de la Photoresistance de 10k Ohms.
Sketch :
/*
SparkFun Inventor’s Kit : PHOTORESISTOR
Use a photoresistor (light sensor) to control the brightnessof a LED.
Hardware connections:
Photo resistor:
Connect one side of the photoresistor to 5 Volts (5V).
Connect the other side of the photoresistor to ANALOG pin 0.
Connect a 10K resistor between ANALOG pin 0 and GND.
LED:
Connect the positive side (long leg) of the LED to
digital pin 9. (To vary the brightness, this pin must
support PWM, which is indicated by « ~ » or « PWM » on the
Arduino itself.) Connect the negative side of the LED (short leg) to a
330 Ohm resistor.
Connect the other side of the resistor to GND.
*/
const int sensorPin = 0;
const int ledPin = 9;
int lightLevel = 0, high = 0, low = 1023;
void setup()
{
pinMode(ledPin, OUTPUT);
analogWrite(ledPin, 255);
delay(1000);
analogWrite(ledPin, 0);
delay(1000);
Serial.begin(9600);
Serial.println(« Setup done »);
}
void loop()
{
lightLevel = analogRead(sensorPin);
Serial.print(lightLevel);
// the analogRead() function
// returns values between 0 and 1023, and the analogWrite()
// function wants values from 0 to 255.
autoTune(); // have the Arduino do the work for us!
Serial.print(« : » );
Serial.println(lightLevel);
analogWrite(ledPin, lightLevel);
delay(100);
}
void autoTune()
{
if (lightLevel < low) { low = lightLevel; } if (lightLevel > high)
{
high = lightLevel;
}
lightLevel = map(lightLevel, low + 30, high – 30, 0, 255);
//– If you want to light the light from light to dark uncomment the folowing line
lightLevel = 255 – lightLevel;
lightLevel = constrain(lightLevel, 0, 255);
}
Références :
