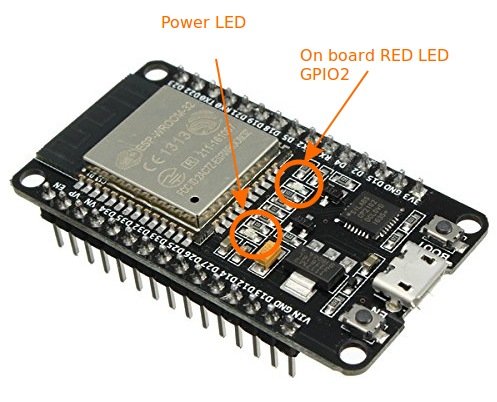
Update ESP32 DEV Module sélectionnez pour la carte ci-dessous et l’IDE ARDUINO

https://randomnerdtutorials.com/esp32-esp8266-send-email-notification/
https://randomnerdtutorials.com/esp32-i2c-communication-arduino-ide/
Camera :
Ouvrez le panneau des préférences et cliquez sur le bouton situé à droite de l’option URL de gestionnaire de cartes supplémentaires (une ligne par carte supplémentaire) inscrire :
https://dl.espressif.com/dl/package_esp32_index.json
IMPORTANT!!!
   - Select Board "AI Thinker ESP32-CAM"
   - GPIO 0 must be connected to GND to upload a sketch
   - After connecting GPIO 0 to GND, press the ESP32-CAM on-board RESET button to put your board in flashing mode
La carte fonctionne aussi avec le type ESP32 Wrover Module et le Partition Scheme: « Huge APP(3 MB No OTA) »
https://projetsdiy.fr/esp32-cam-flash-firmware-test-domoticz-jeedom-home-assistant-nextdom-node-red/
http://domotics.fr/index.php/2019/04/21/serveur-web-de-streaming-video-pour-esp32-cam/
We’ve updated some instructions in our ESP32-CAM projects, so that you have no trouble making them working.
Here are the projects:
– ESP32-CAM Video Streaming and Face Recognition with Arduino IDE: get started with the ESP32-CAM and set up a web server with all the functionalities.
– ESP32-CAM Video Streaming Web Server: turn your ESP32-CAM into an IP cam.
– ESP32-CAM Take Photo and Save to MicroSD Card: learn how to take and save photos with the ESP32-CAM.
– ESP32-CAM PIR Motion Detector with Photo Capture (saves to microSD card): take a photo and save to the microSD card when motion is detected.
– ESP32-CAM Take Photo and Display in Web Server: build a web server that allows you to take a photo and display the last photo taken. : Attention, prendre une première photo ! puis refresh sinon rien n’est affiché
Tips to get your projects working:
– Have the latest version of Arduino IDE and ESP32 boards updated;
– Check the wiring between the FTDI programmer and the ESP32-CAM when uploading code;
– Follow the exact steps we describe in the tutorials to upload code;
– Make sure you know your camera module pin assignment, and change it in the code if needed;
– Power your ESP32-CAM with a 5V power supply;
– Check if your board is set to use the internal, or external antenna. If it is set to use the external antenna you need to attach one, otherwise it won’t be able to pick up Wi-Fi signal.
If you have any trouble making your ESP32-CAM work, you can check our ESP32-CAM Troubleshooting Guide.
I hope you’ve found these tips helpful and you have fun building these projects. More ESP32-CAM projects coming soon!
Regards,
Rui Santos